203 lines
10 KiB
Markdown
203 lines
10 KiB
Markdown
# whiteboard
|
|
|
|
This is a lightweight NodeJS collaborative Whiteboard/Sketchboard witch can easily be customized...
|
|
|
|

|
|
|
|
## Demowhiteboard
|
|
|
|
[HERE](https://cloud13.de/testwhiteboard/) (Reset every night)
|
|
|
|
## Updating
|
|
|
|
Information related to updating this app can be found [here](./doc/updating_guide.md).
|
|
|
|
## Some Features
|
|
|
|
- Shows remote user cursors while drawing
|
|
- Undo / Redo function for each user
|
|
- Drag+Drop / Copy+Paste Images or PDFs from PC and Browsers
|
|
- Resize, Move, Rotate & Draw Images to Canvas or Background
|
|
- Write text
|
|
- Save Whiteboard to Image and JSON
|
|
- Draw angle lines by pressing "shift" while drawing (with line tool)
|
|
- Draw square by pressing "shift" while drawing (with rectangle tool)
|
|
- Indicator that shows the smallest screen participating
|
|
- Keybindings for ALL the functions
|
|
- Working on PC, Tablet & Mobile
|
|
|
|
## Projects using this Whiteboard
|
|
|
|
- [meetzi](https://meetzi.de/) - WebRtc Conference tool
|
|
- [Accelerator](https://github.com/cracker0dks/Accelerator) - WebRtc Conference tool
|
|
- Your Project here...
|
|
|
|
## Install the App
|
|
|
|
You can run this app with and without docker
|
|
|
|
### Without Docker
|
|
|
|
1. install the latest NodeJs (version >= 12)
|
|
2. Clone the app
|
|
3. Run `npm ci` inside the folder
|
|
4. Run `npm run start:prod`
|
|
5. Surf to http://YOURIP:8080
|
|
|
|
### With Docker
|
|
|
|
1. `docker run -d -p 8080:8080 rofl256/whiteboard`
|
|
2. Surf to http://YOURIP:8080
|
|
|
|
## Development
|
|
|
|
After you have installed the app, run `npm run start:dev` to start the backend and a frontend development server. The website will be accessible on http://locahost:8080.
|
|
|
|
## Default keyboard shortcuts
|
|
|
|
Use keyboard shortcuts to become more productive while using Whiteboard.
|
|
|
|
They are especially useful if you work with interactive displays such as XP-Pen Artist, Huion Kamvas and Wacom Cintiq. These devices have quick buttons (6-8 buttons and scrolling). By default, the buttons on these displays are mapped to standard Photoshop keyboard shortcuts. Keys can be configured to function effectively in other software.
|
|
|
|
The following are predefined shortcuts that you can override in the file [./src/js/keybinds.js](./src/js/keybinds.js)
|
|
|
|
| Result | Windows and Linux | macOS |
|
|
| ---------------------------------------------------------------- | -------------------- | ----------------------- |
|
|
| Clear the whiteboard | Ctrl + Shift + Z | Command + Shift + Z |
|
|
| Undo your last step | Ctrl + Z | Command + Z |
|
|
| Redo your last undo | Ctrl + Y | Command + Y |
|
|
| Select an area | Ctrl + X | Command + X |
|
|
| Take the mouse | Ctrl + M | Command + M |
|
|
| Take the pen | Ctrl + P | Command + P |
|
|
| Draw a line | Ctrl + L | Command + L |
|
|
| Draw a rectangle | Ctrl + R | Command + R |
|
|
| Draw a circle | Ctrl + C | Command + C |
|
|
| Toggle between line, rectangle and circle | Ctrl + Shift + F | Command + Shift + F |
|
|
| Toggle between pen and eraser | Ctrl + Shift + X | Command + Shift + X |
|
|
| Toggle between main clolors (black, blue, green, yellow and red) | Ctrl + Shift + R | Command + Shift + R |
|
|
| Write text | Ctrl + A | Command + A |
|
|
| Take the eraser | Ctrl + E | Command + E |
|
|
| Increase thickness | Ctrl + Up Arrow | Command + Up Arrow |
|
|
| Decrease thickness | Ctrl + Down Arrow | Command + Down Arrow |
|
|
| Colorpicker | Ctrl + Shift + C | Command + Shift + C |
|
|
| Set black color | Ctrl + Shift + 1 | Command + Shift + 1 |
|
|
| Set blue color | Ctrl + Shift + 2 | Command + Shift + 2 |
|
|
| Set green color | Ctrl + Shift + 3 | Command + Shift + 3 |
|
|
| Set yellow color | Ctrl + Shift + 4 | Command + Shift + 4 |
|
|
| Set red color | Ctrl + Shift + 5 | Command + Shift + 5 |
|
|
| Save whiteboard as image | Ctrl + S | Command + S |
|
|
| Save whiteboard as JSON | Ctrl + Shift + K | Command + Shift + K |
|
|
| Save whiteboard to WebDav | Ctrl + Shift + I (i) | Command + Shift + I (i) |
|
|
| Load saved JSON to whiteboard | Ctrl + Shift + J | Command + Shift + J |
|
|
| Share whiteboard | Ctrl + Shift + S | Command + Shift + S |
|
|
| Hide or show toolbar | Tab | Tab |
|
|
| Move selected object up | Up Arrow | Up Arrow |
|
|
| Move selected object down | Down Arrow | Down Arrow |
|
|
| Move selected object left | Left Arrow | Left Arrow |
|
|
| Move selected object right | Right Arrow | Right Arrow |
|
|
| Drop object | Ctrl + Enter | Command + Enter |
|
|
| Add Image to backgroud | Shift + Enter | Shift + Enter |
|
|
| Cancel all actions | Escape | Escape |
|
|
| Delete selected object | Delete | Delete |
|
|
| Use Line tool when pen is active (Not changeable) | Shift (Hold) | Shift (Hold) |
|
|
|
|
## URL Parameters
|
|
|
|
Call your site with GET parameters to change the WhiteboardID or the Username
|
|
|
|
`http://YOURIP:8080?whiteboardid=MYID&username=MYNAME`
|
|
|
|
- whiteboardid => All people with the same ID are drawing on the same board
|
|
- username => The name witch is showing to others while drawing
|
|
- title => Change the name of the Browser Tab
|
|
- randomid => if set to true, a random whiteboardId will be generated if not given aswell
|
|
|
|
## Configuration
|
|
|
|
Many settings of this project can be set using a simple `yaml` file, to change some behaviors or tweak performances.
|
|
|
|
### Config. file
|
|
|
|
To run the project with custom settings:
|
|
|
|
1. Create a `config.run.yml` file based on the content of [`config.default.yml`](./config.default.yml),
|
|
2. Change the settings,
|
|
3. Run the project with your custom configuration (it will be merged into the default one):
|
|
|
|
- locally: `node scripts/server.js --config=./config.run.yml`
|
|
- docker: `docker run -d -p 8080:8080 -v $(pwd)/config.run.yml:/config.run.yml:ro rofl256/whiteboard --config=/config.run.yml`
|
|
|
|
### Highlights
|
|
|
|
#### Security - AccessToken (Optional)
|
|
|
|
To prevent clients who might know or guess the base URL from abusing the server to upload files and stuff..., you can set an accesstoken at server start (see [here](./config.default.yml)).
|
|
|
|
Then set the same token on the client side as well:
|
|
|
|
<b>Client (With and without docker):</b> `http://YOURIP:8080?accesstoken=mySecToken&whiteboardid=MYID&username=MYNAME`
|
|
|
|
Done!
|
|
|
|
#### WebDAV (Optional)
|
|
|
|
This function allows your users to save the whiteboard directly to a webdav server (Nextcloud) as image without downloading it.
|
|
|
|
To enable set `enableWebdav` to `true` in the [configuration](./config.default.yml).
|
|
|
|
Then set the same parameter on the client side as well:
|
|
|
|
<b>Client (With and without docker):</b> `http://YOURIP:8080?webdav=true&whiteboardid=MYID&username=MYNAME`
|
|
|
|
Refresh the site and You will notice an extra save button in the top panel. Set your WebDav Parameters, and you are good to go!
|
|
|
|
Note: For the most owncloud/nextcloud setups you have to set the WebDav-Server URL to: https://YourDomain.tl/remote.php/webdav/
|
|
|
|
Done!
|
|
|
|
### And many more (performance, etc.)
|
|
|
|
Many more settings can be tweaked. All of them are described in the [default config file](./config.default.yml).
|
|
|
|
## Things you may want to know
|
|
|
|
- Whiteboards are gone if you restart the Server, so keep that in mind (or save your whiteboard)
|
|
- You should be able to customize the layout without ever touching the whiteboard.js (take a look at index.html & main.js)
|
|
|
|
## ToDo
|
|
|
|
- Make undo function more reliable on texts
|
|
|
|
## Nginx Reverse Proxy configuration
|
|
|
|
Add this to your server part:
|
|
|
|
```
|
|
location /whiteboard/ {
|
|
proxy_set_header HOST $host;
|
|
proxy_http_version 1.1;
|
|
proxy_set_header Upgrade $http_upgrade;
|
|
proxy_set_header Connection upgrade;
|
|
proxy_pass http://YOURIP:8080/;
|
|
}
|
|
```
|
|
|
|
To run it at /whiteboard. Don't forget to change -> YOURIP!
|
|
|
|
## Nextcloud integration
|
|
|
|
1. Install this app on your server
|
|
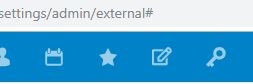
2. Enable and go to "external sites" (app) on your Nextcloud
|
|
3. Add a link to your server: `https://YOURIP/whiteboard/?whiteboardid=WHITEBOARDNAME&username={uid}`
|
|
You can give each group its own whiteboard by changeing the WHITEBOARDNAME in the URL if you want.
|
|
|
|
Note: You might have to serve the app with https (If your nextcloud server runs https). To do so, its recommend to run this app behind a reverse proxy. (as shown above)
|
|
|
|
#### (Optional) Set whiteboard icon in nextcloud
|
|
|
|
|
|
|
|
Upload both icons present at /doc/nextcloud_icons/ to your nextcloud at the "external sites" admin section. Then set it as symbol on your link.
|
|
|
|
**_ MIT License _**
|